
前回、Mattermostのホスティングとセルフホスティングを試してみました。
今回はMattermostクライアントをWindowsとmacOSとLinux(Ubuntu)にインストールしてみたいと思います。

前提条件
今回Mattermostクライアントをインストールする環境は以下の通りです。
【Windows】
- OS : Windows11 21H1
- CPU : 6C/6T
- MEM : 16GB
- DISK : 256GB
Windows8.1以上をサポートしています。
【macOS】
- OS : macOS Monterey 12.6
- CPU : 4C4T
- MEM : 8GB
- DISK : 256GB
macOSはMojave(10.14)以上がサポートされています。
【Linux】
- OS : Ubuntu 20.04
- CPU : 4vCPU
- MEM : 12GB
- DISK : 256GB
Linuxについては、Ubuntu 18.04以上をサポートしています。
ただ、tarballで提供されているため、汎用のLinuxでもインストールすることができます。
Mattermostクライアントのスペックは要件として見つけられませんでしたが、よほど低スペックなPCでなければ問題ないと思います。
Windowsへの導入(exe形式)

以下のページより、[Mattermost Mobile and Desktop Apps]にアクセスし、[Windows]の[Download]を選択します。
Mattermost Download : https://mattermost.com/apps/
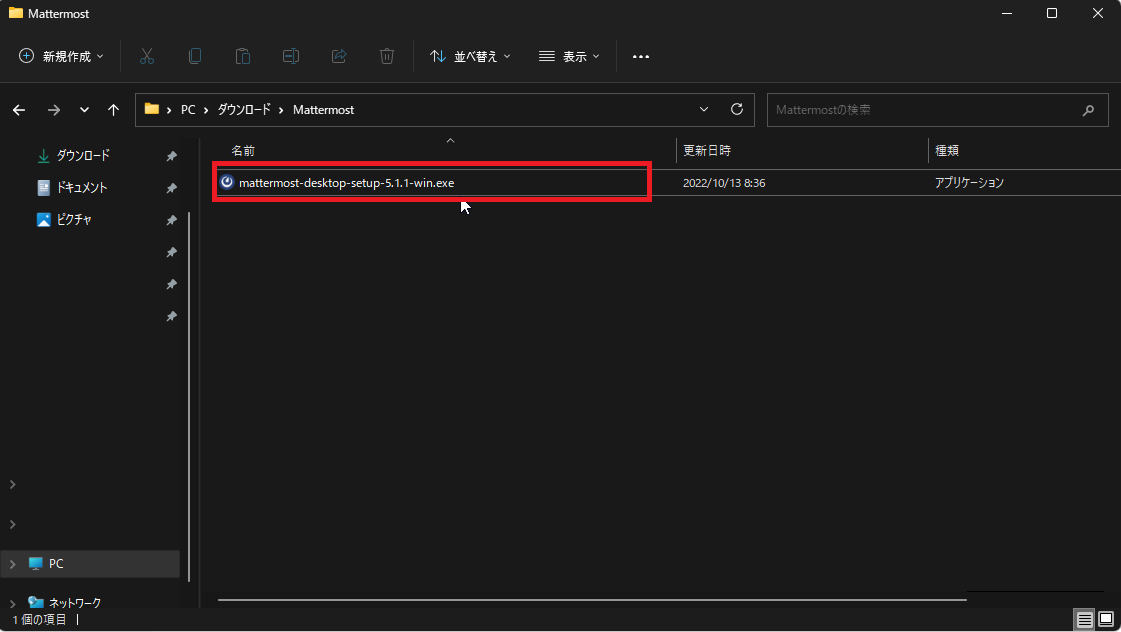
ダウンロードしたMattermost Windows Appの実行ファイルを実行します。
実行すると、自動的にインストールされます。
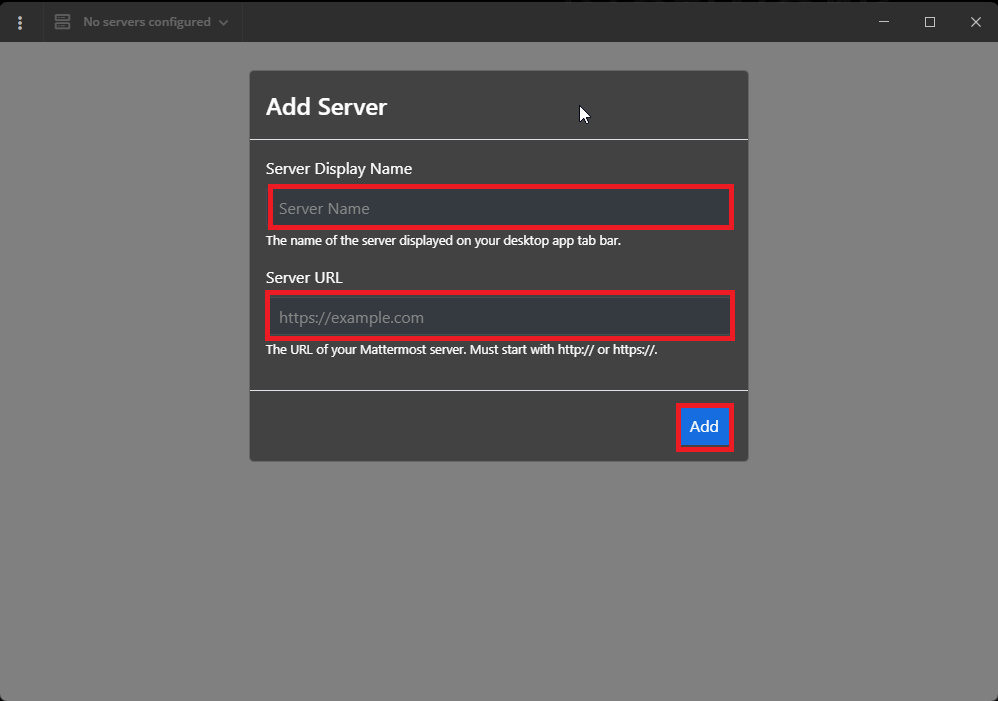
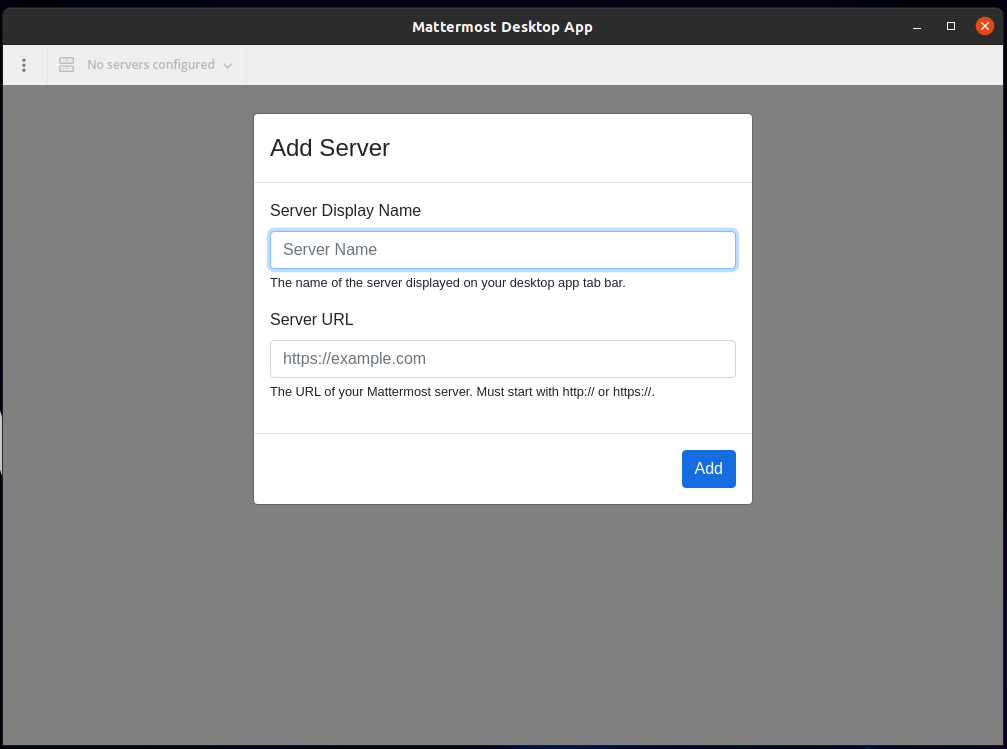
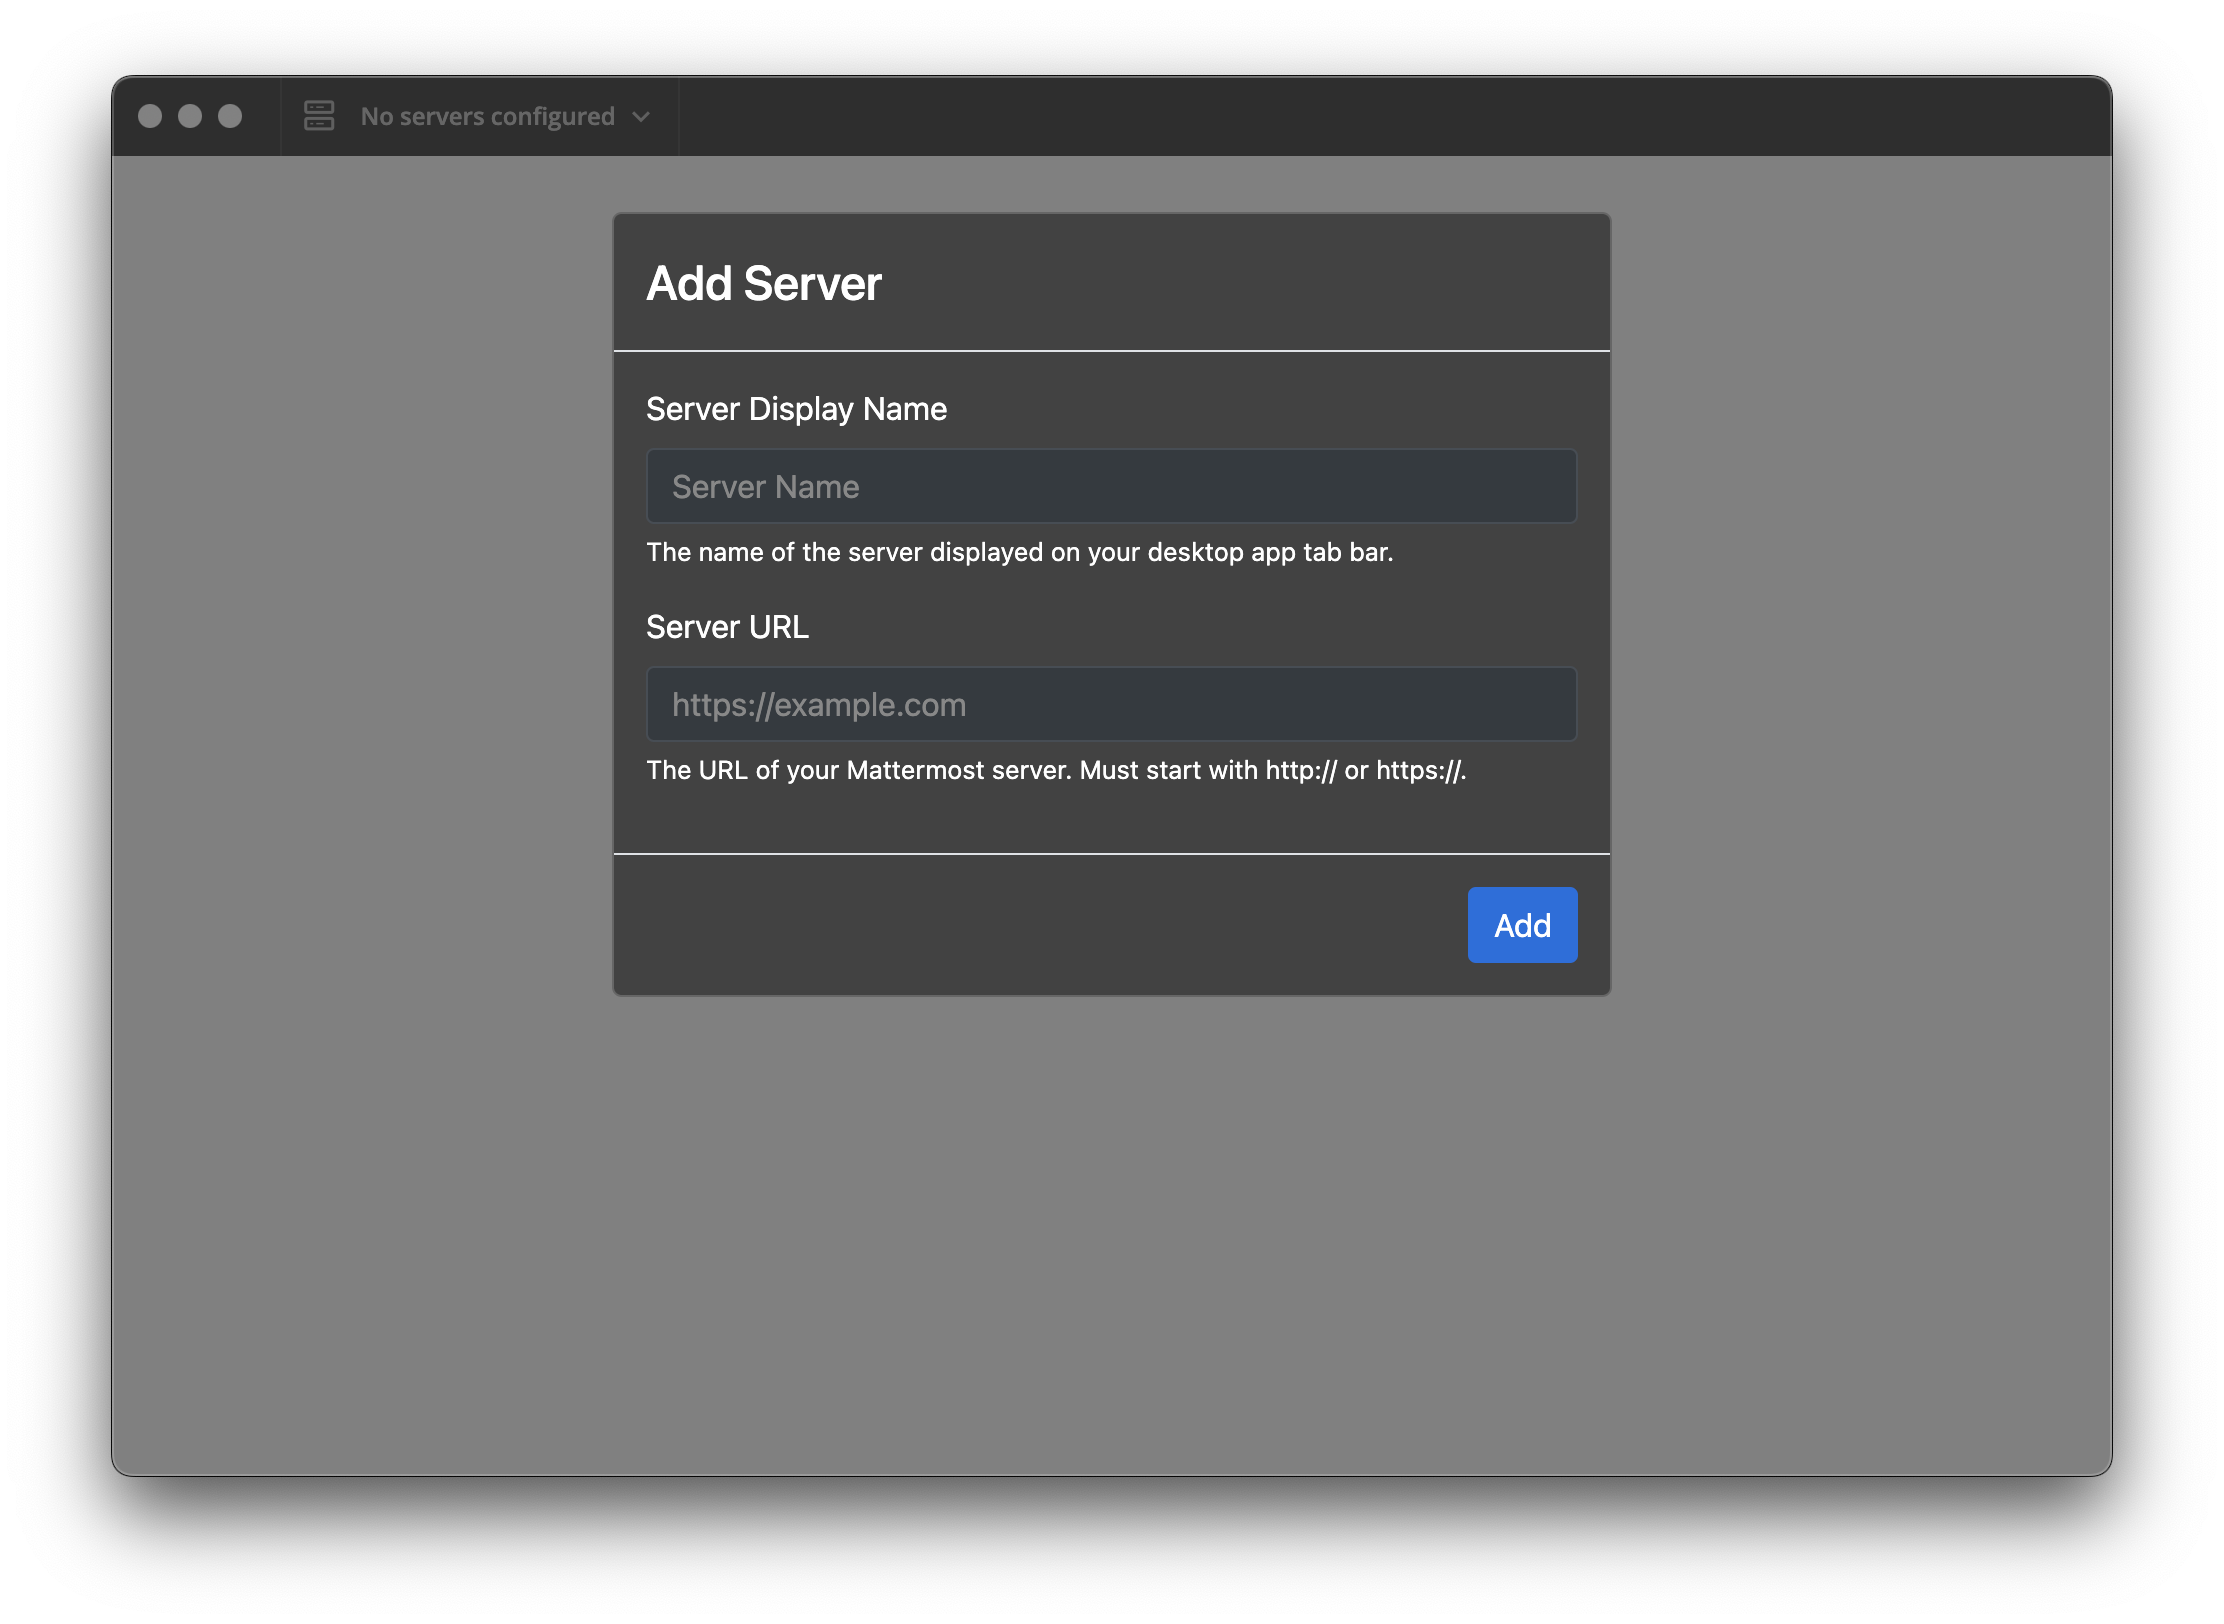
[Add Server]より、以下の設定を行います。
- Server Display Name : Mattermostサーバ名称(任意の名前)
- Server URL : MattermostサーバのURL
設定が完了したら、[Add]を押下します。
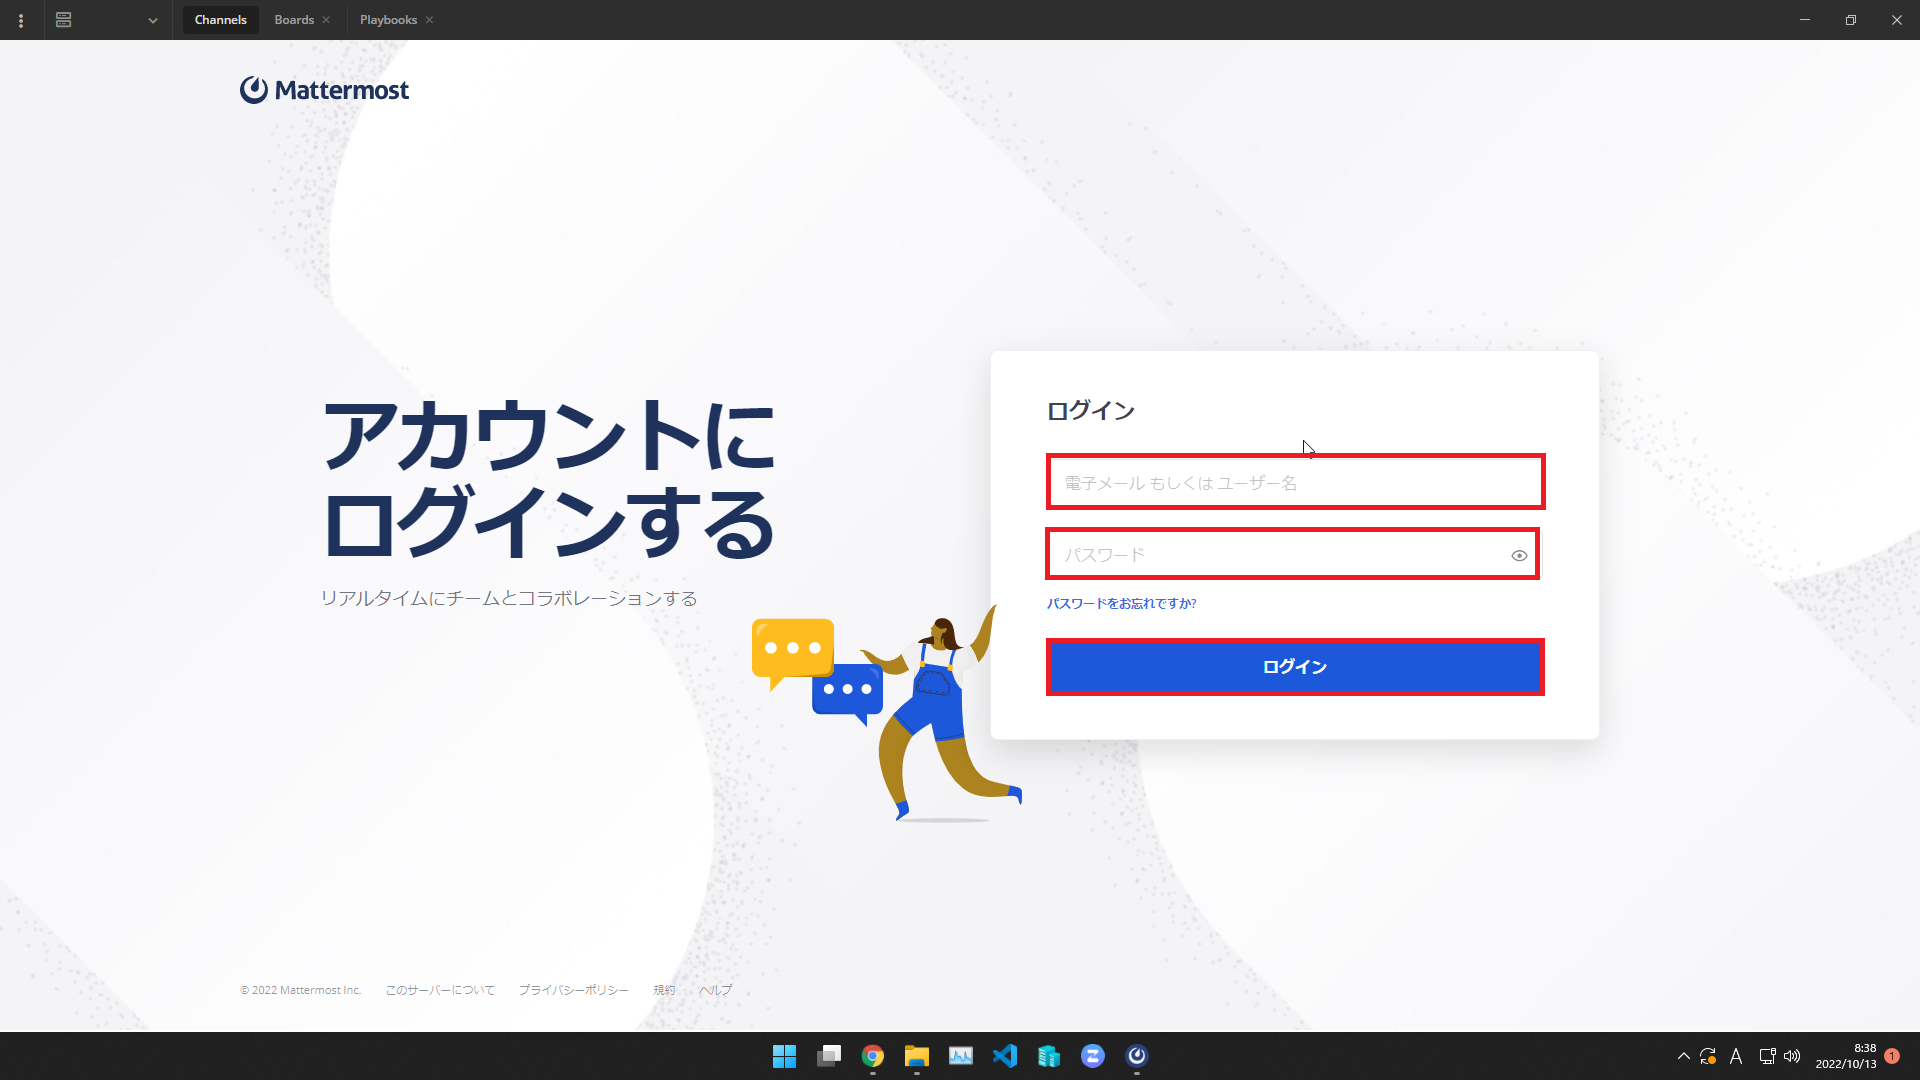
[アカウントにログインする]より、以下の情報を設定します。
- 電子メールもしくはユーザ名 : Mattermostに登録したメール or ユーザ名
- パスワード : ユーザに対するパスワード
設定が完了したら、[ログイン]を押下します。
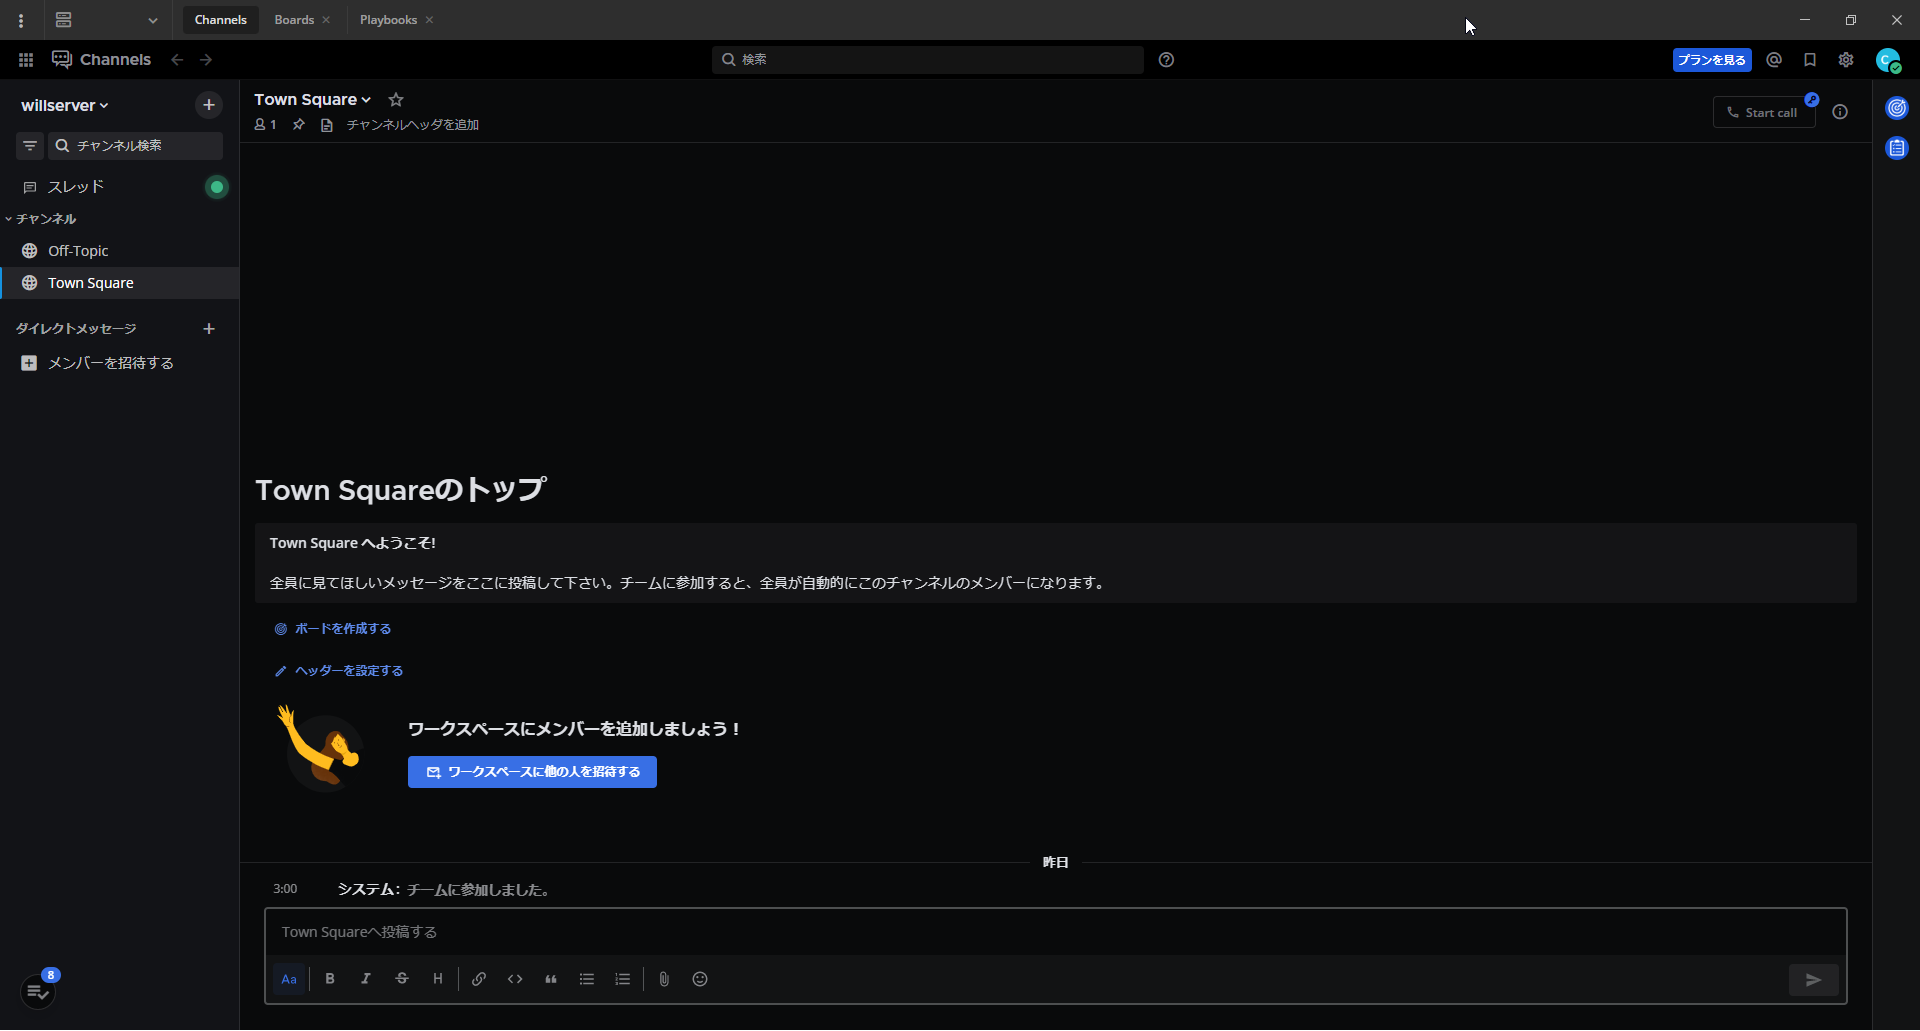
チームにログインでき、チャットなどができることを確認します。
基本的なことはブラウザと同様の動作ができるので、確認します。
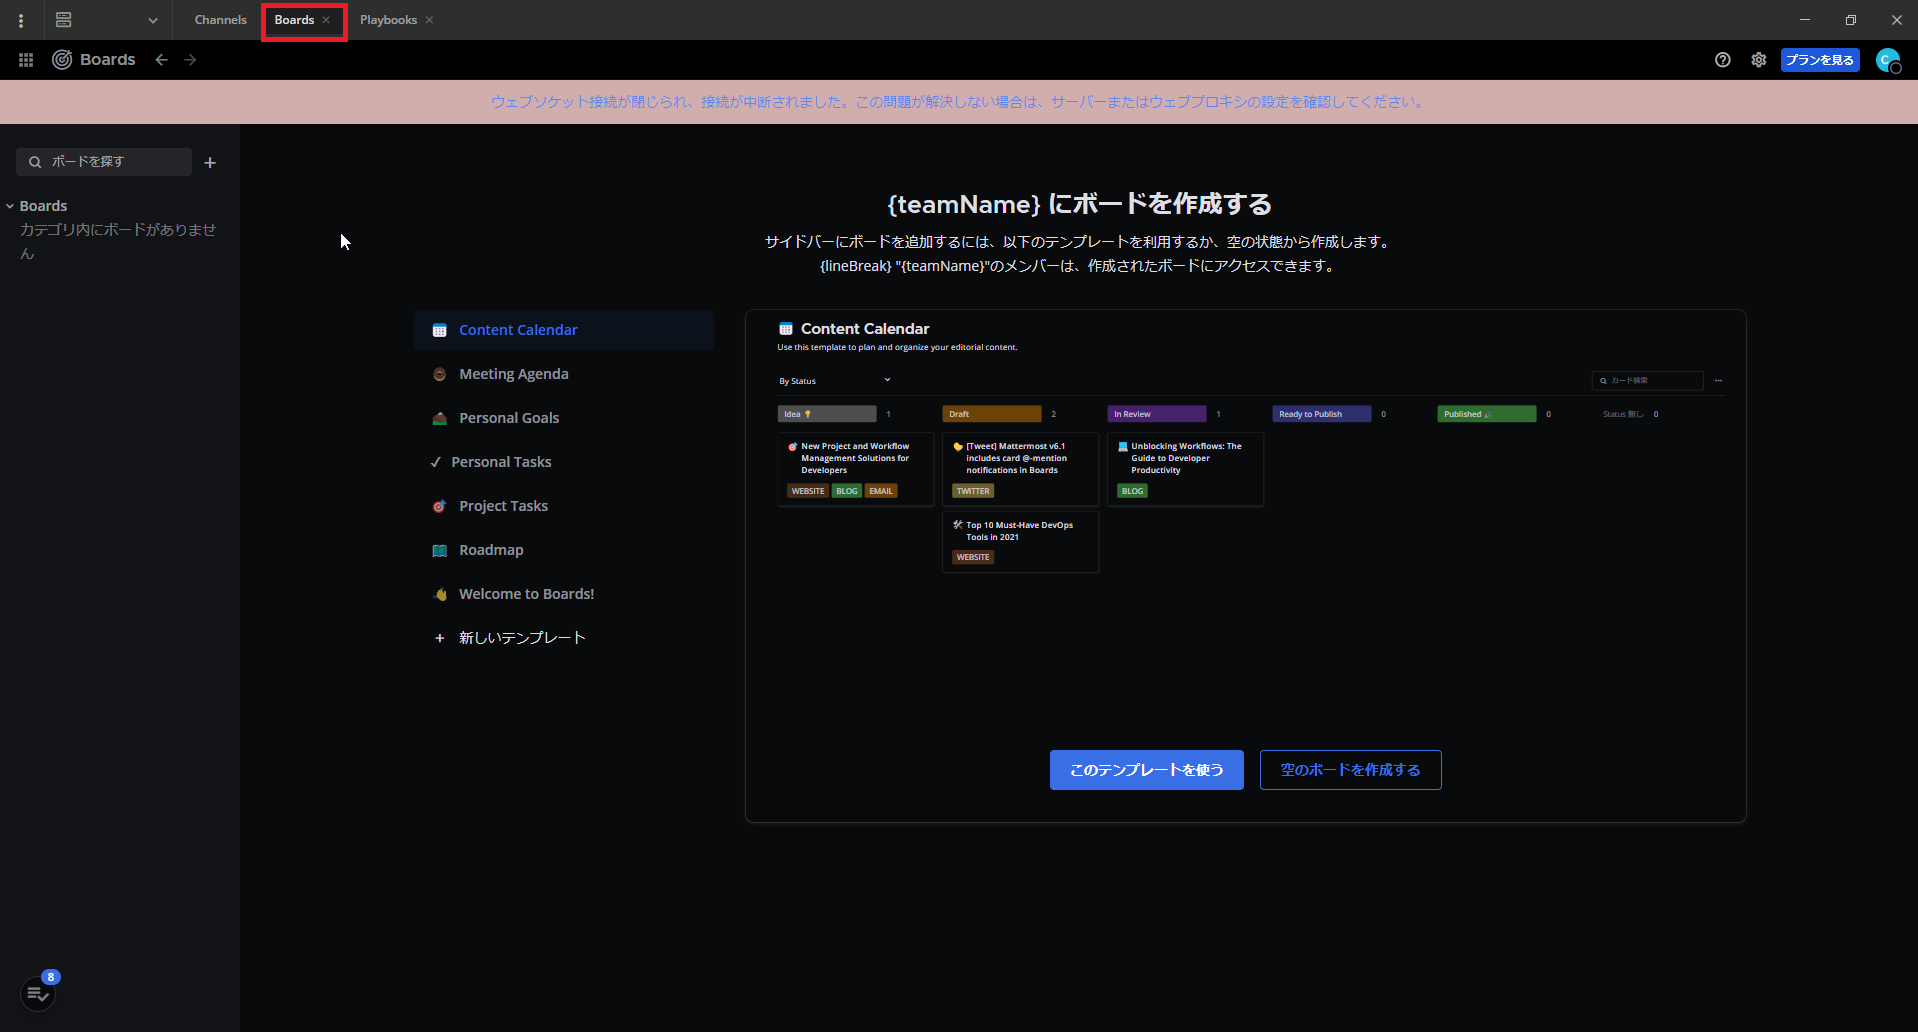
[Boads]タブに移動して、Boadsの稼働確認を行います。
今回はProxyを経由しているため、WebSocketの許可が入っていないことがわかりました。
これも後で修正したいと思います。
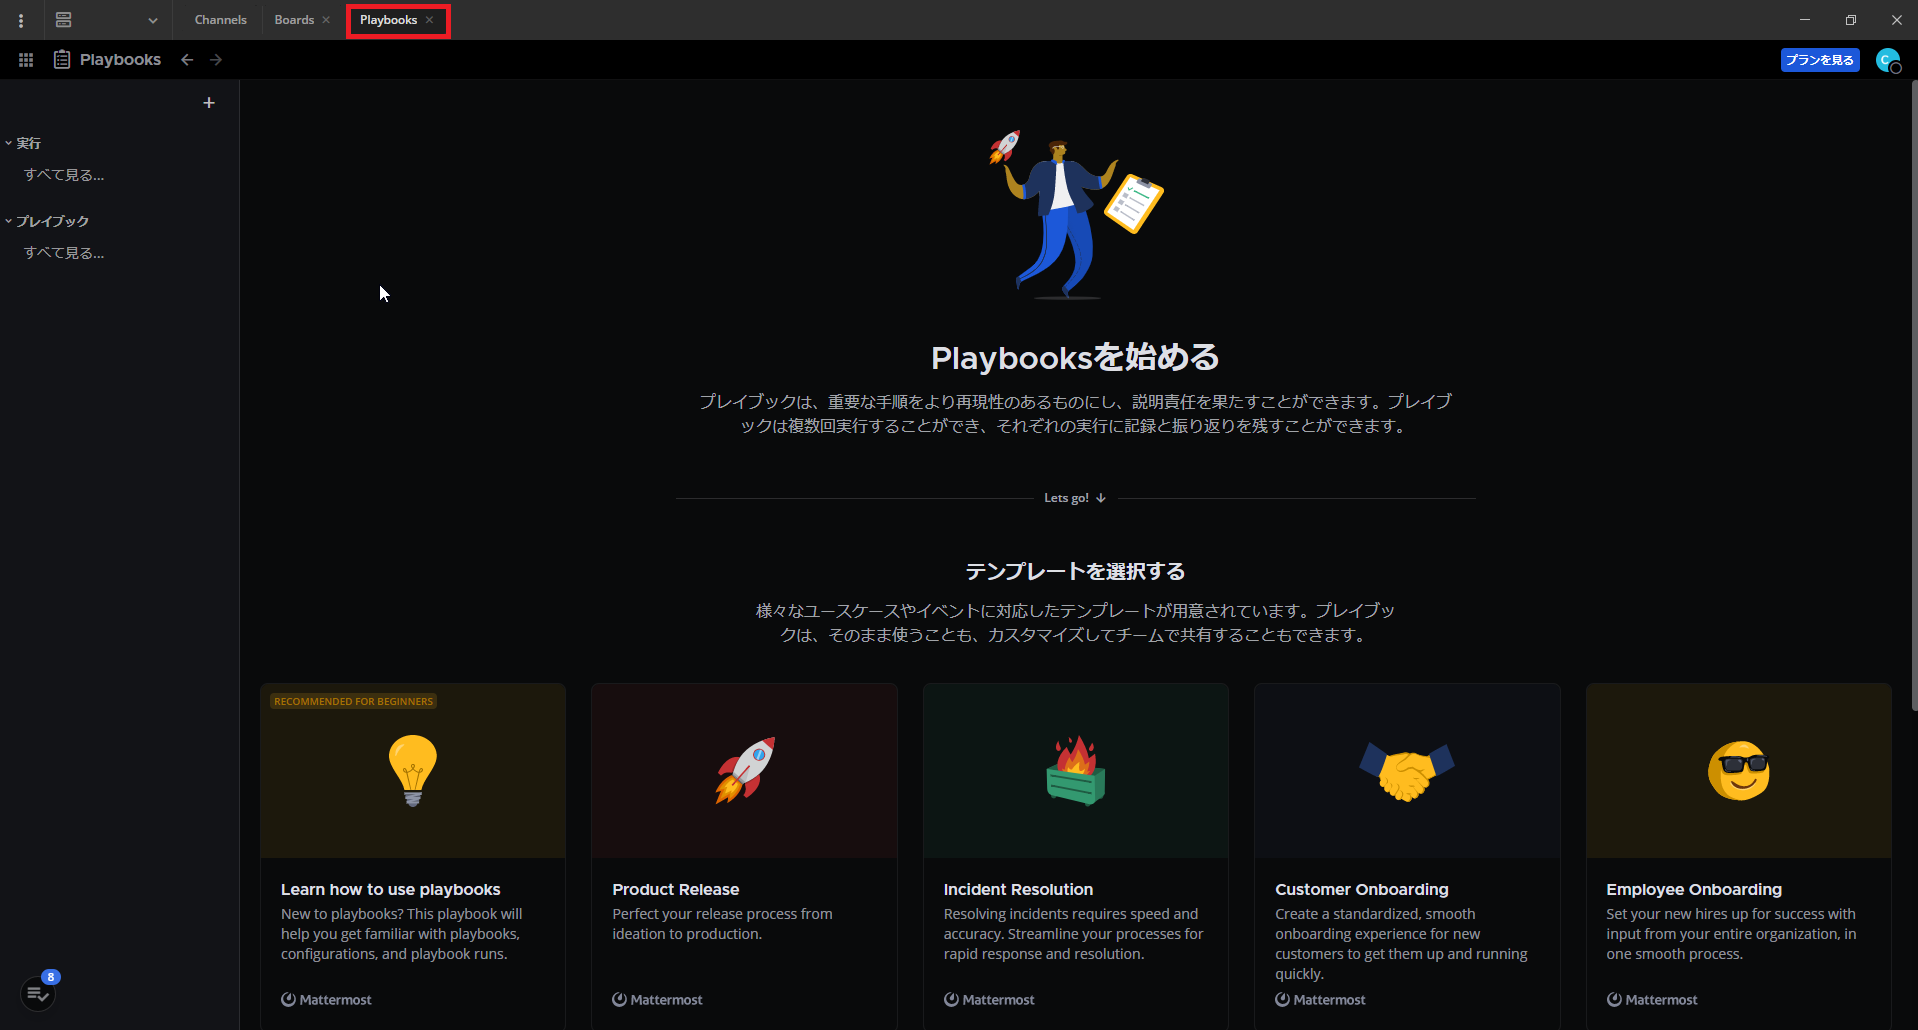
[Playbooks]タブに移動して、Playbooksの稼働確認を行います。
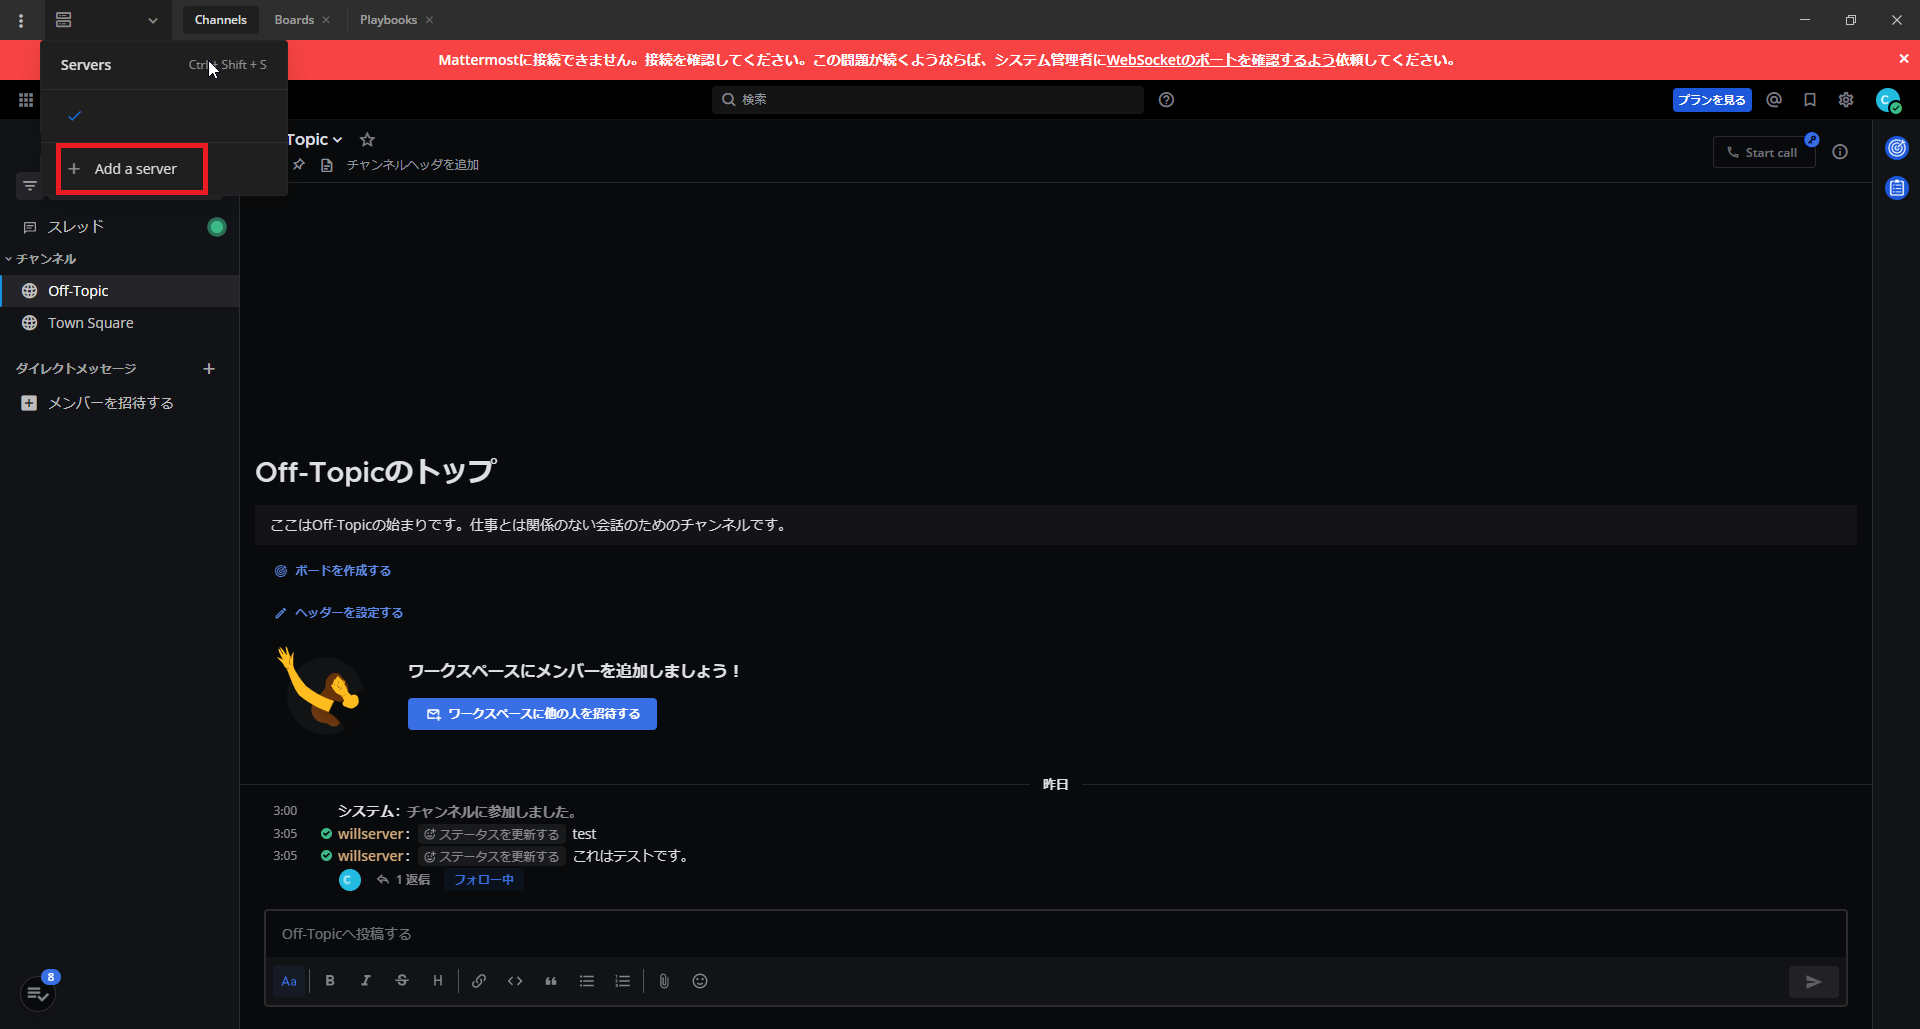
MattermostのWeb版だとServerの切り替えができませんでしたが、クライアントだとServerの切り替えができるようになります。
以上で、Mattermost Desktop AppのWindows exe版のインストールは完了です。
Windowsへの導入(msi形式)
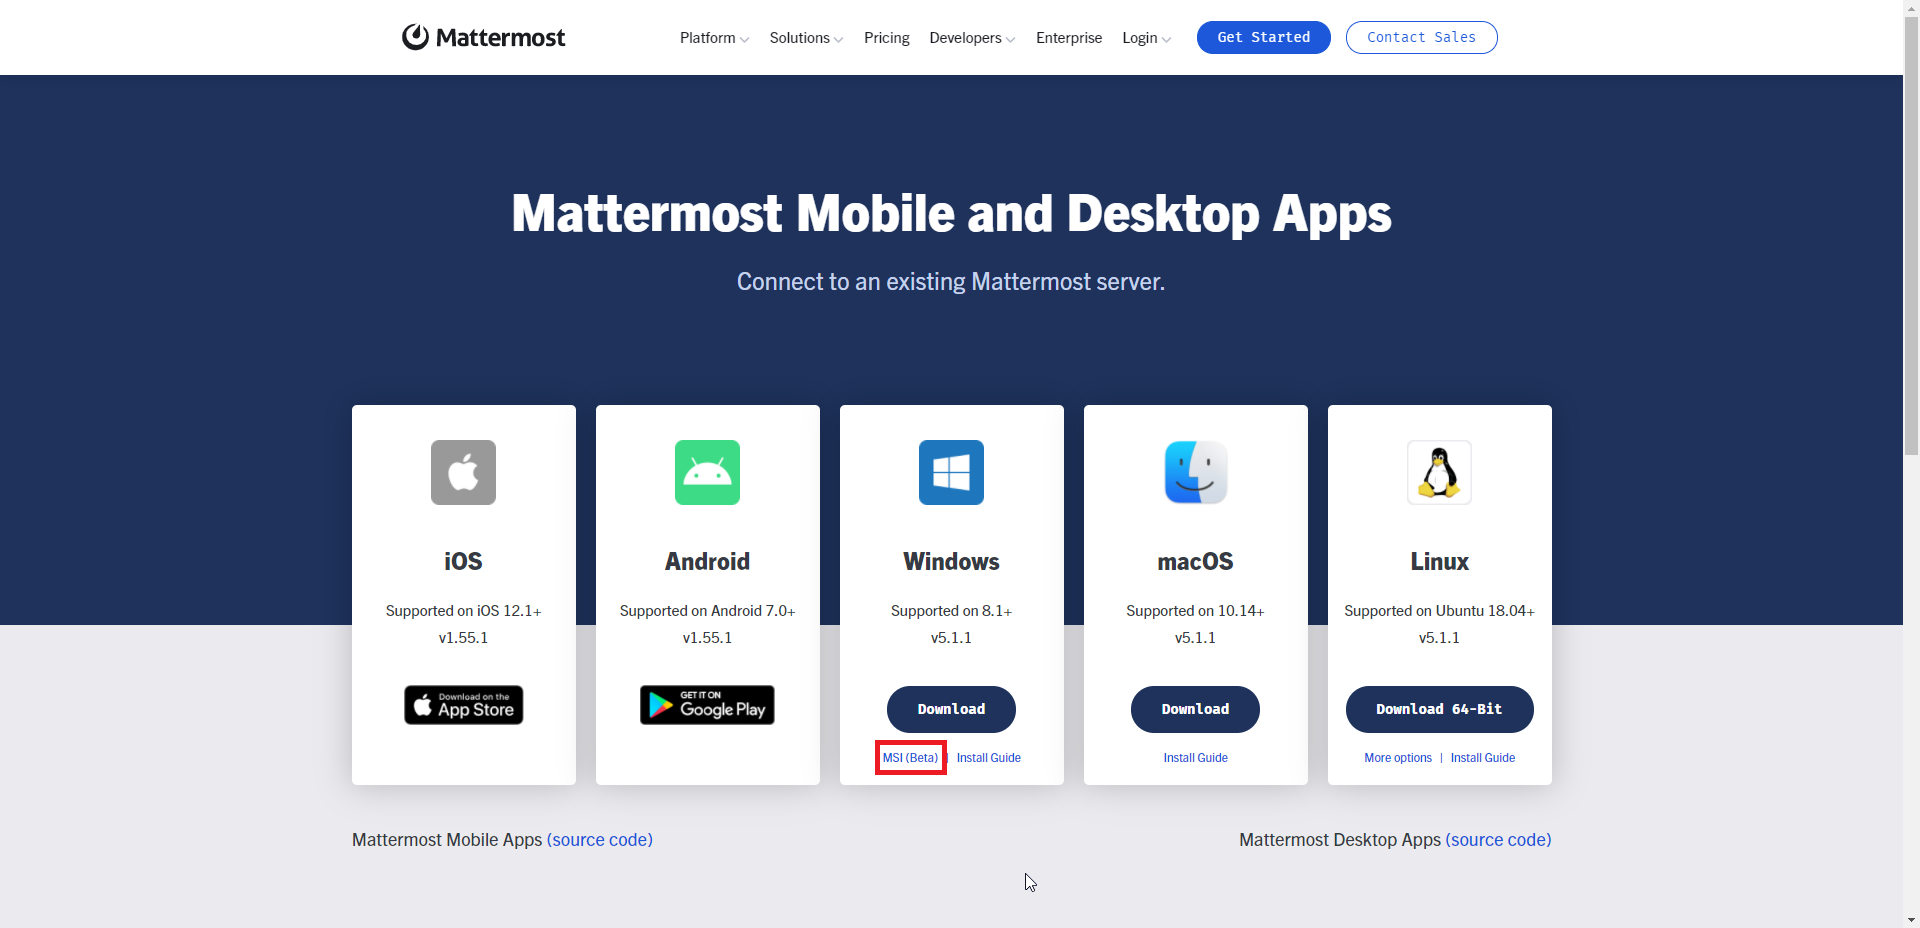
[Mattermost Mobile and Desktop Apps]より、[Windows]の[MSI (Beta)]を押下して、MSI形式のインストーラをダウンロードします。
MSI形式のアプリについては、2022/10/23時点ではベータ版らしいです。
ただ、Active Directoryで配布するにはMSI形式は便利なので、MSIが提供されているのは非常にポイントが高いと思いました。
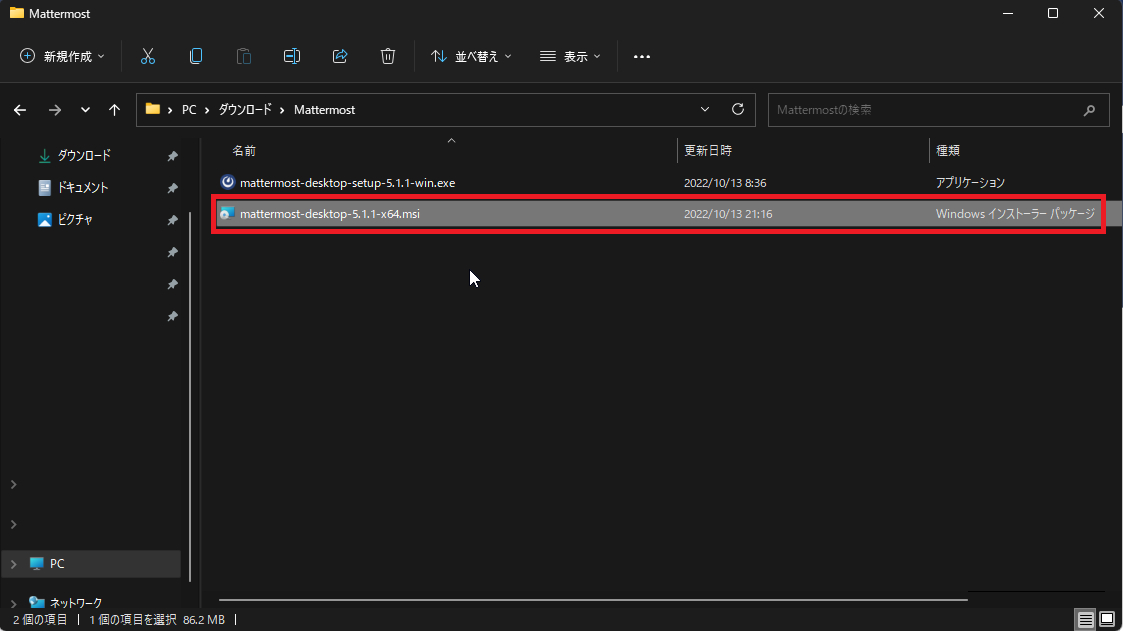
ダウンロードしたMSIを実行してインストールします。
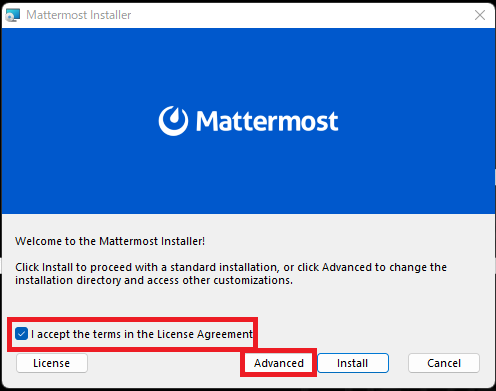
[Welcome to the Mattermost Installer]より、[I accept the term in the License Aggrement]にチェックを入れ、[Advanced]を押下します。
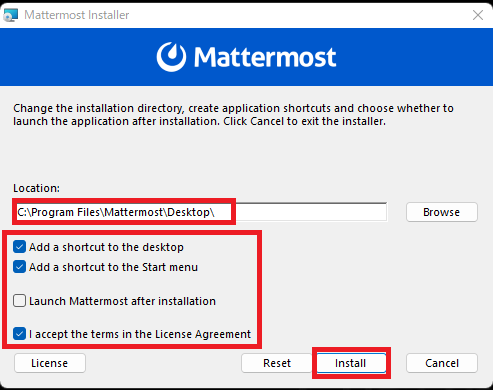
インストールの設定画面より、以下の設定を行います。
- Location : インストールするパスを選択
- Add a shortcut to the desktop : ■ (任意)
- Add a shortcut to the Start menu : ■ (任意)
- Launch Mattermost after installation : □ (任意)
- I accept the terms in the License Aggrement : ■ (任意)
設定が完了したら、[Install]を選択します。
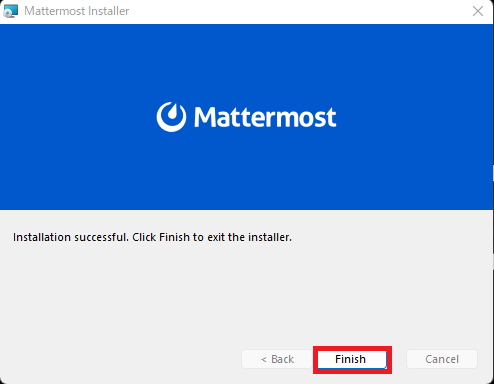
[Installation successful. Click Finish to exit the installer.]と表示されるため、[Finish]を選択して、インストールを完了させます。
あとは、EXE版と同じようにServerを追加して動作確認を行います。
以上でMattermost Desktop Windows App (MSI版)のインストールは完了です。
Linuxへの導入(Ubuntu 20.04)
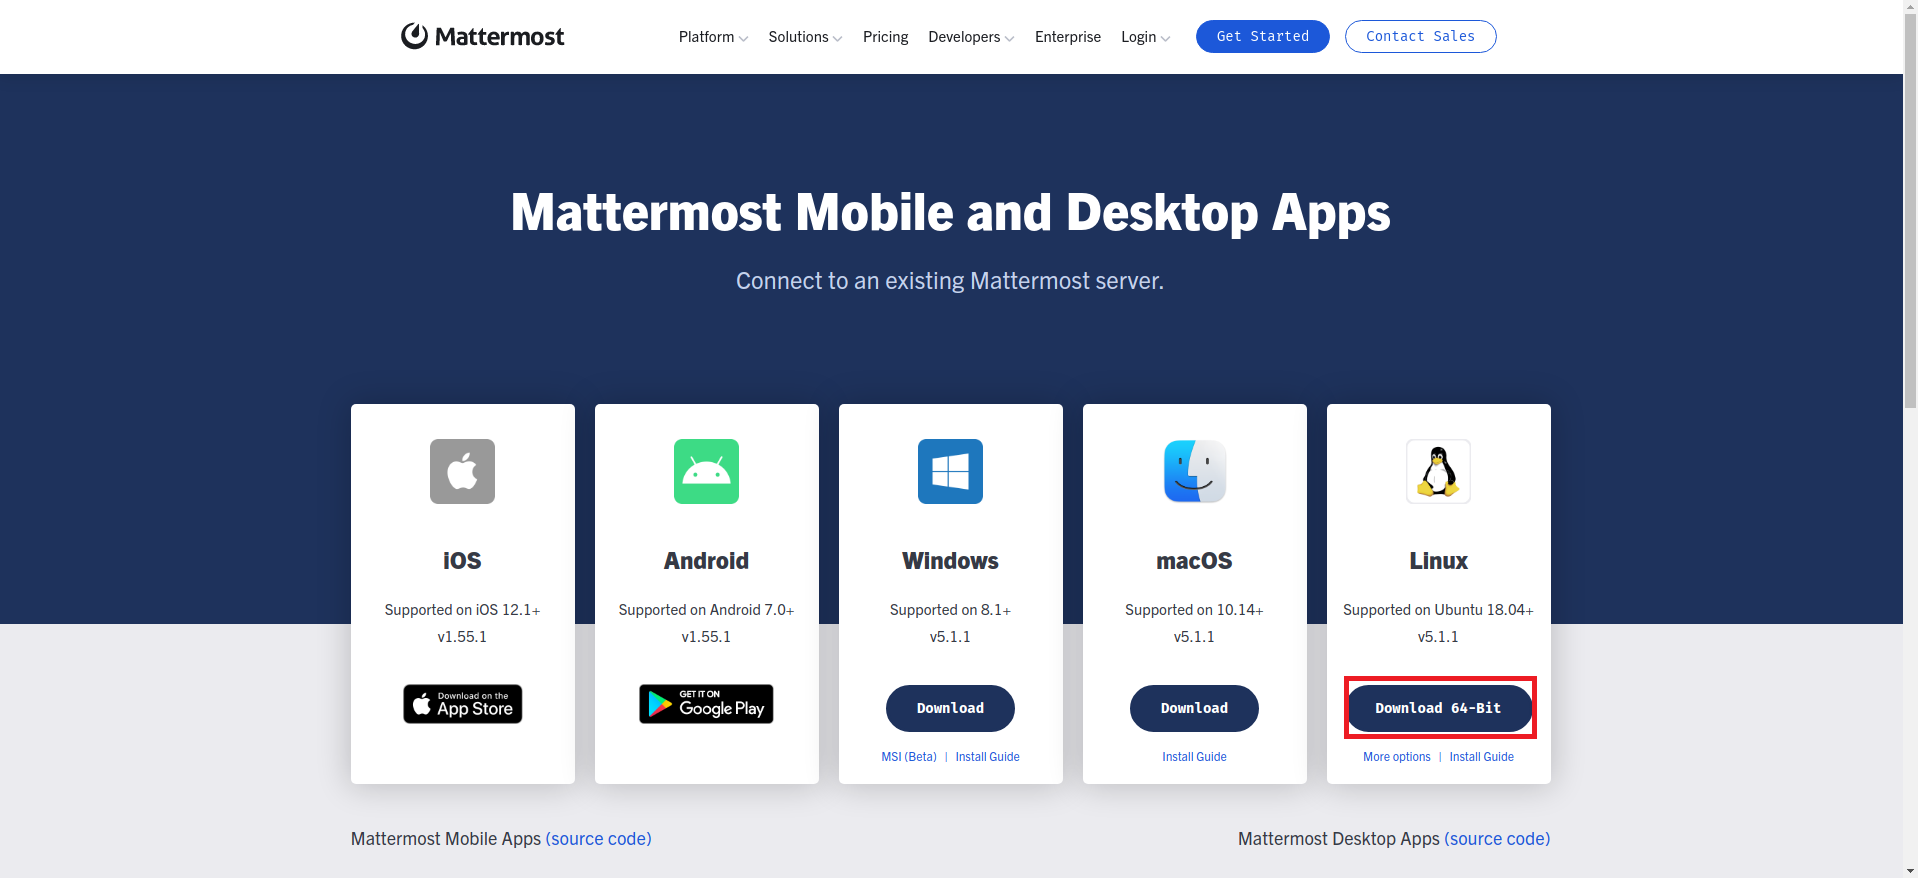
[Mattermost Mobile and Desktop Apps]より、[Linux]のクライアントをダウンロードします。
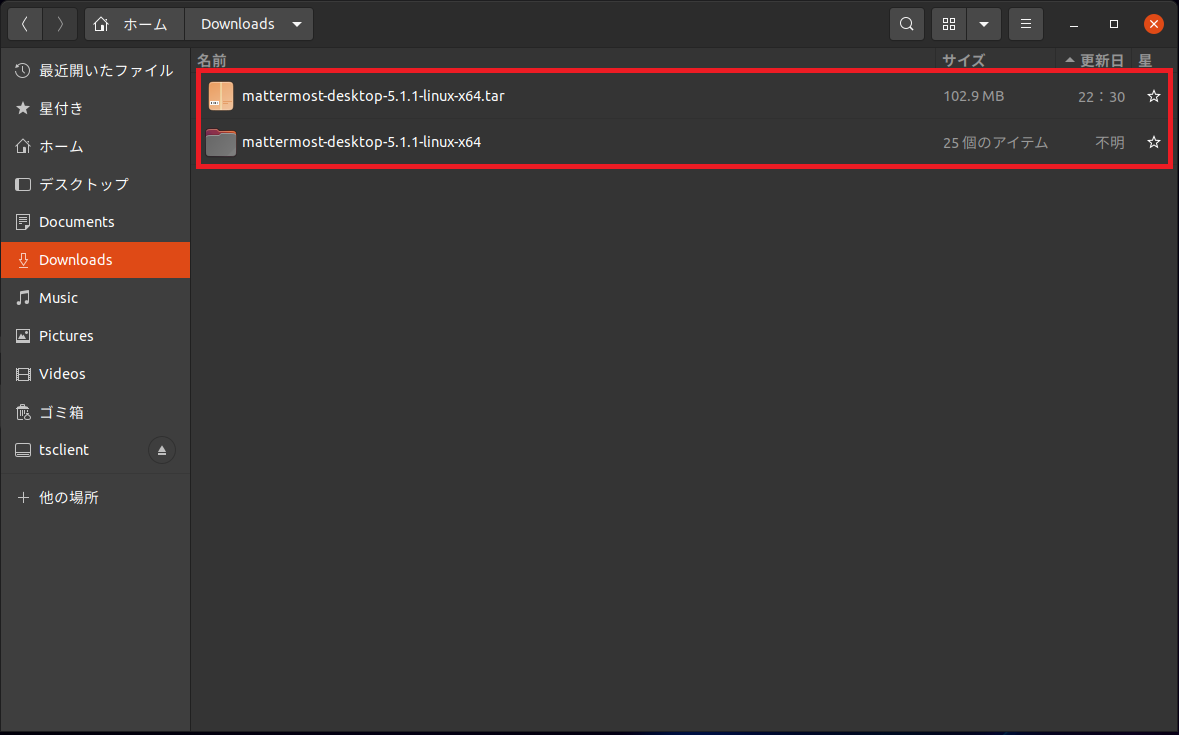
ダウンロードが完了したら、tarballを展開します。
tarballの展開については、GUIでもCLIでも問題ありません。
ただ、この後CLIを使用してインストールするため、CLIで展開したほうが良いと思います。
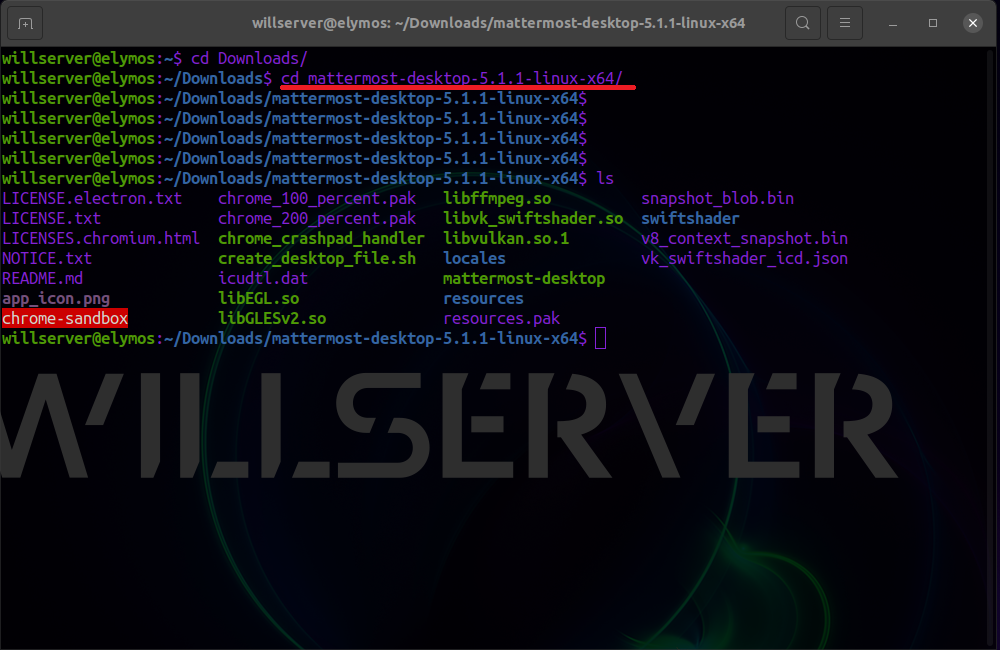
tarballの展開が完了したら、展開したディレクトリをopt配下にコピーします。
$ sudo cp -a ./mattermost-desktop-x.x.x-linux-x64 /opt/
$ cd /opt/mattermost-desktop-x.x.x-linux-x64/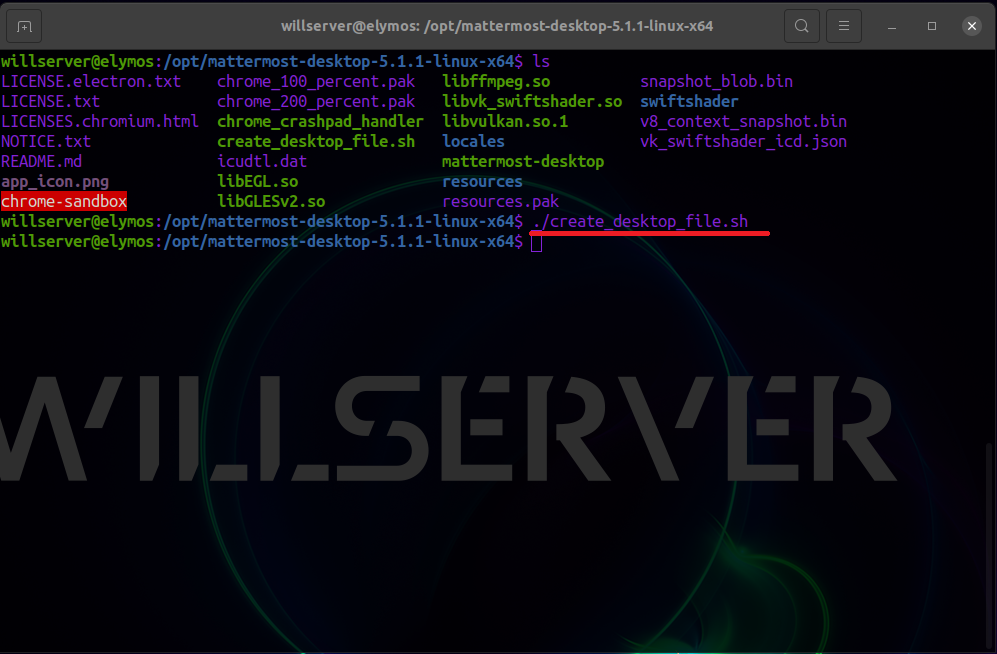
opt配下に移ディレクトリをコピーしたら、シェルスクリプトを実行して、必要なファイルを生成します。
$ ./create_desktop_file.sh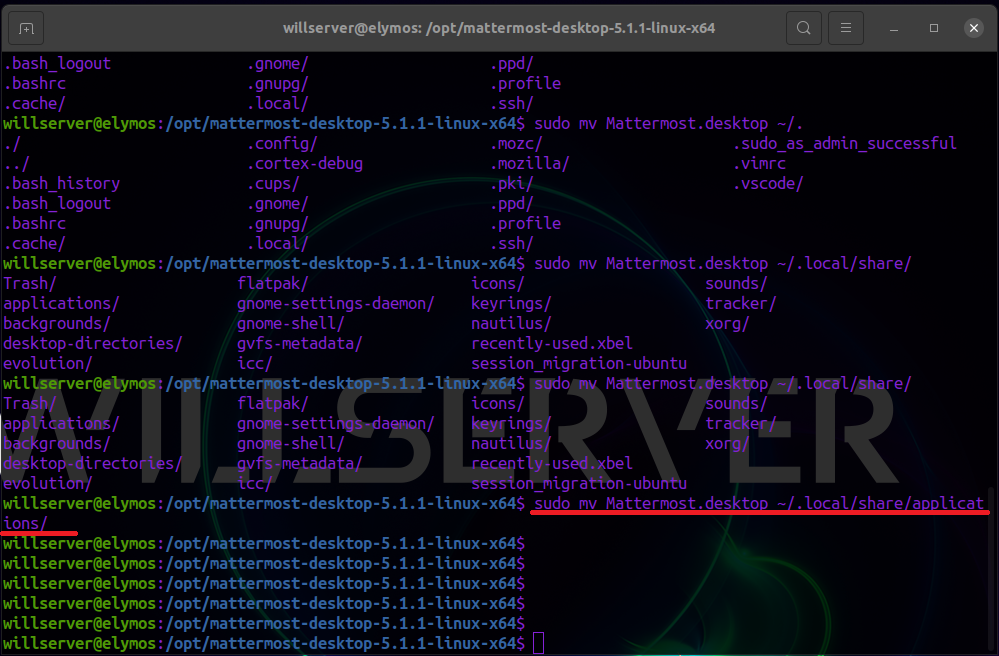
生成した[Mattermost.desktop]ファイルをApplicationsディレクトリ配下に移動します。
$ sudo mv ./Mattermost.desktop ~/.local/share/applications/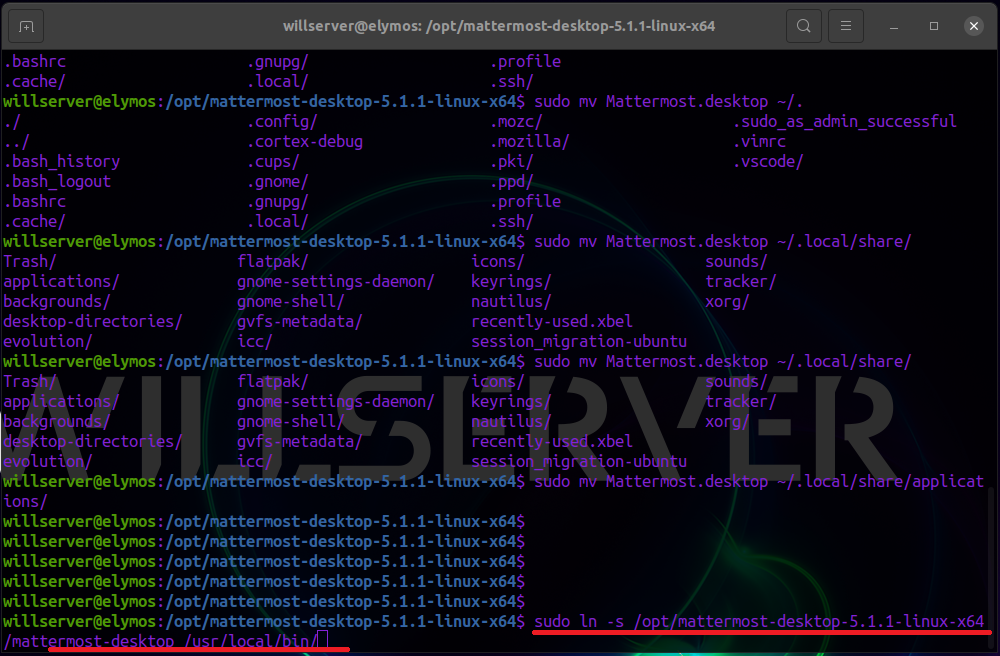
Mattermost.desktopの移動が終わったら、シンボリックリンクを作成します。
$ sudo ln -s /opt/mattermost-desktop-x.x.x-linux-x64/mattermost-desktop /usr/local/bin/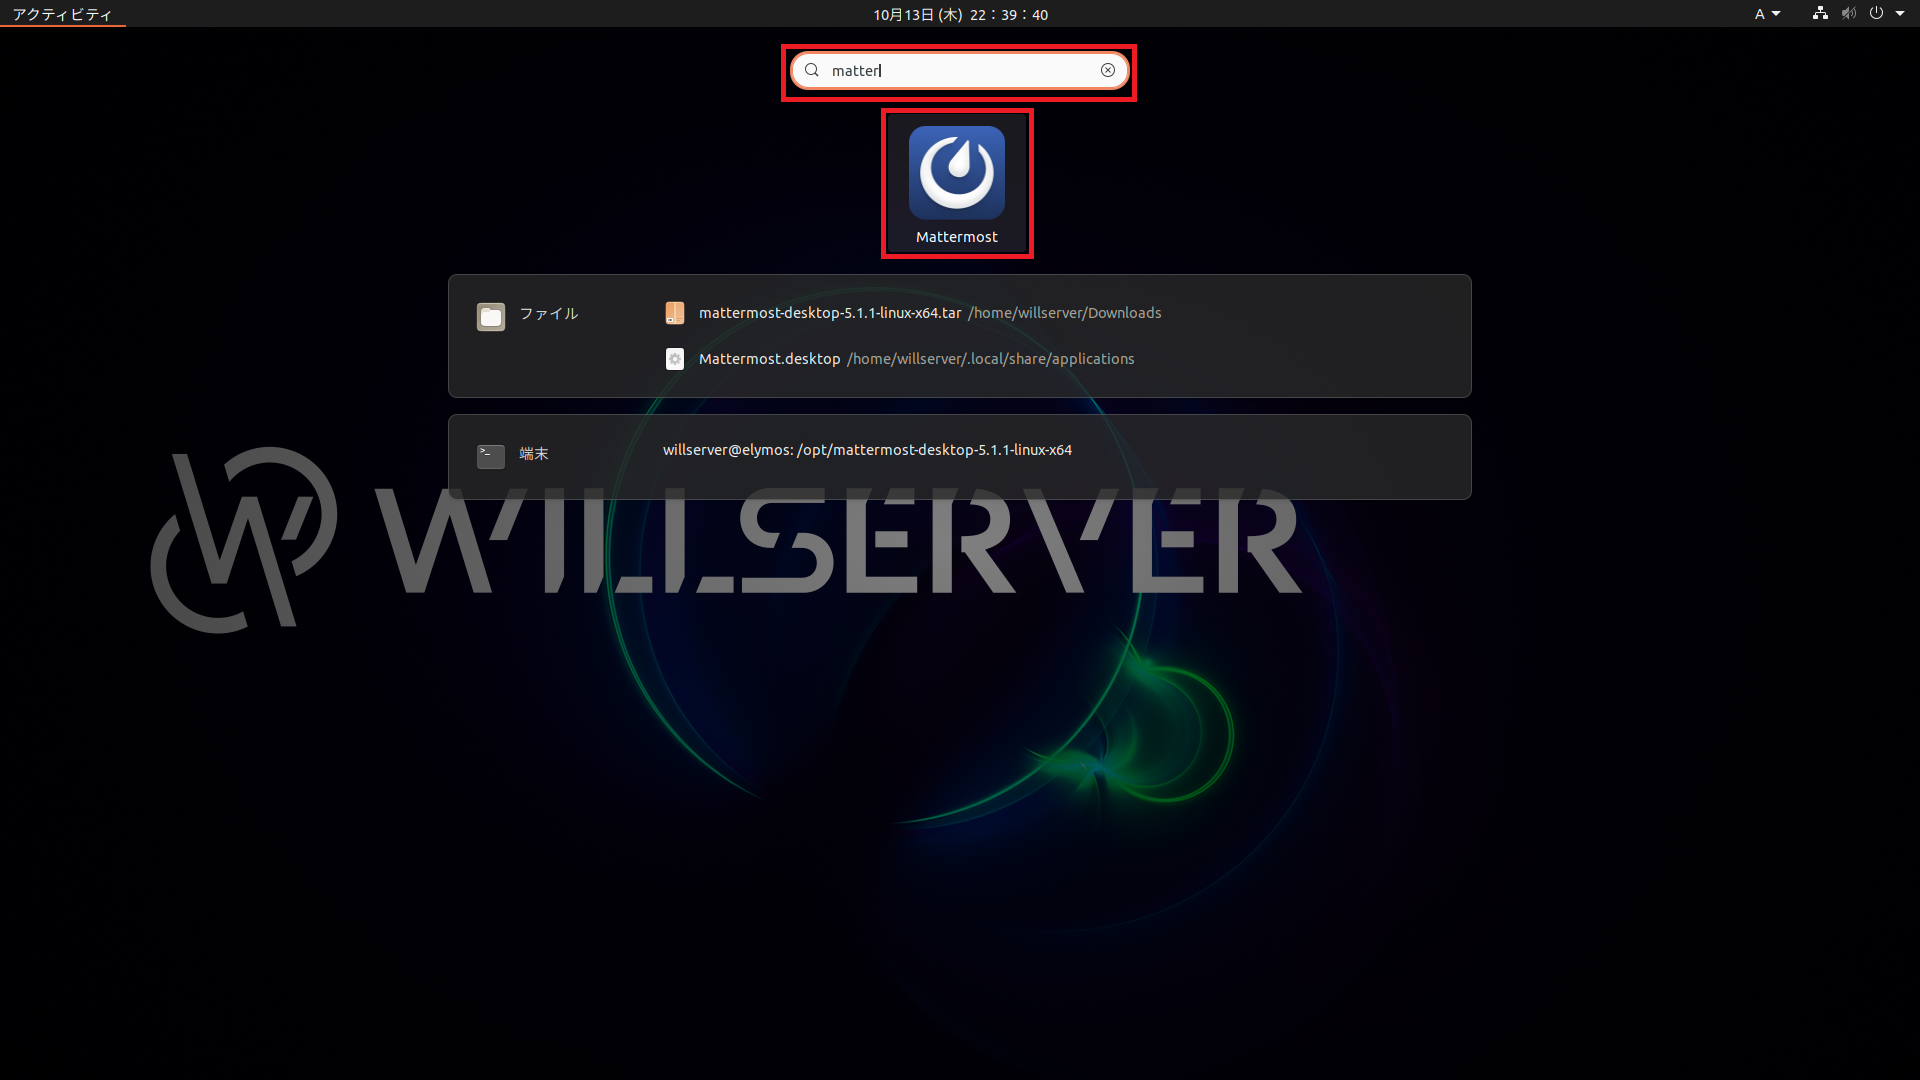
Mattemrost-desktopのシンボリックシンクの作成が完了したら、Ubuntuの検索窓よりMattermostを検索して、実行します。
Add Serverが表示されたら、Windows版と同様に稼働確認をします。
以上で、Linux(Ubuntu)へのMattermostクライアントのインストールは完了です。
macOSへの導入
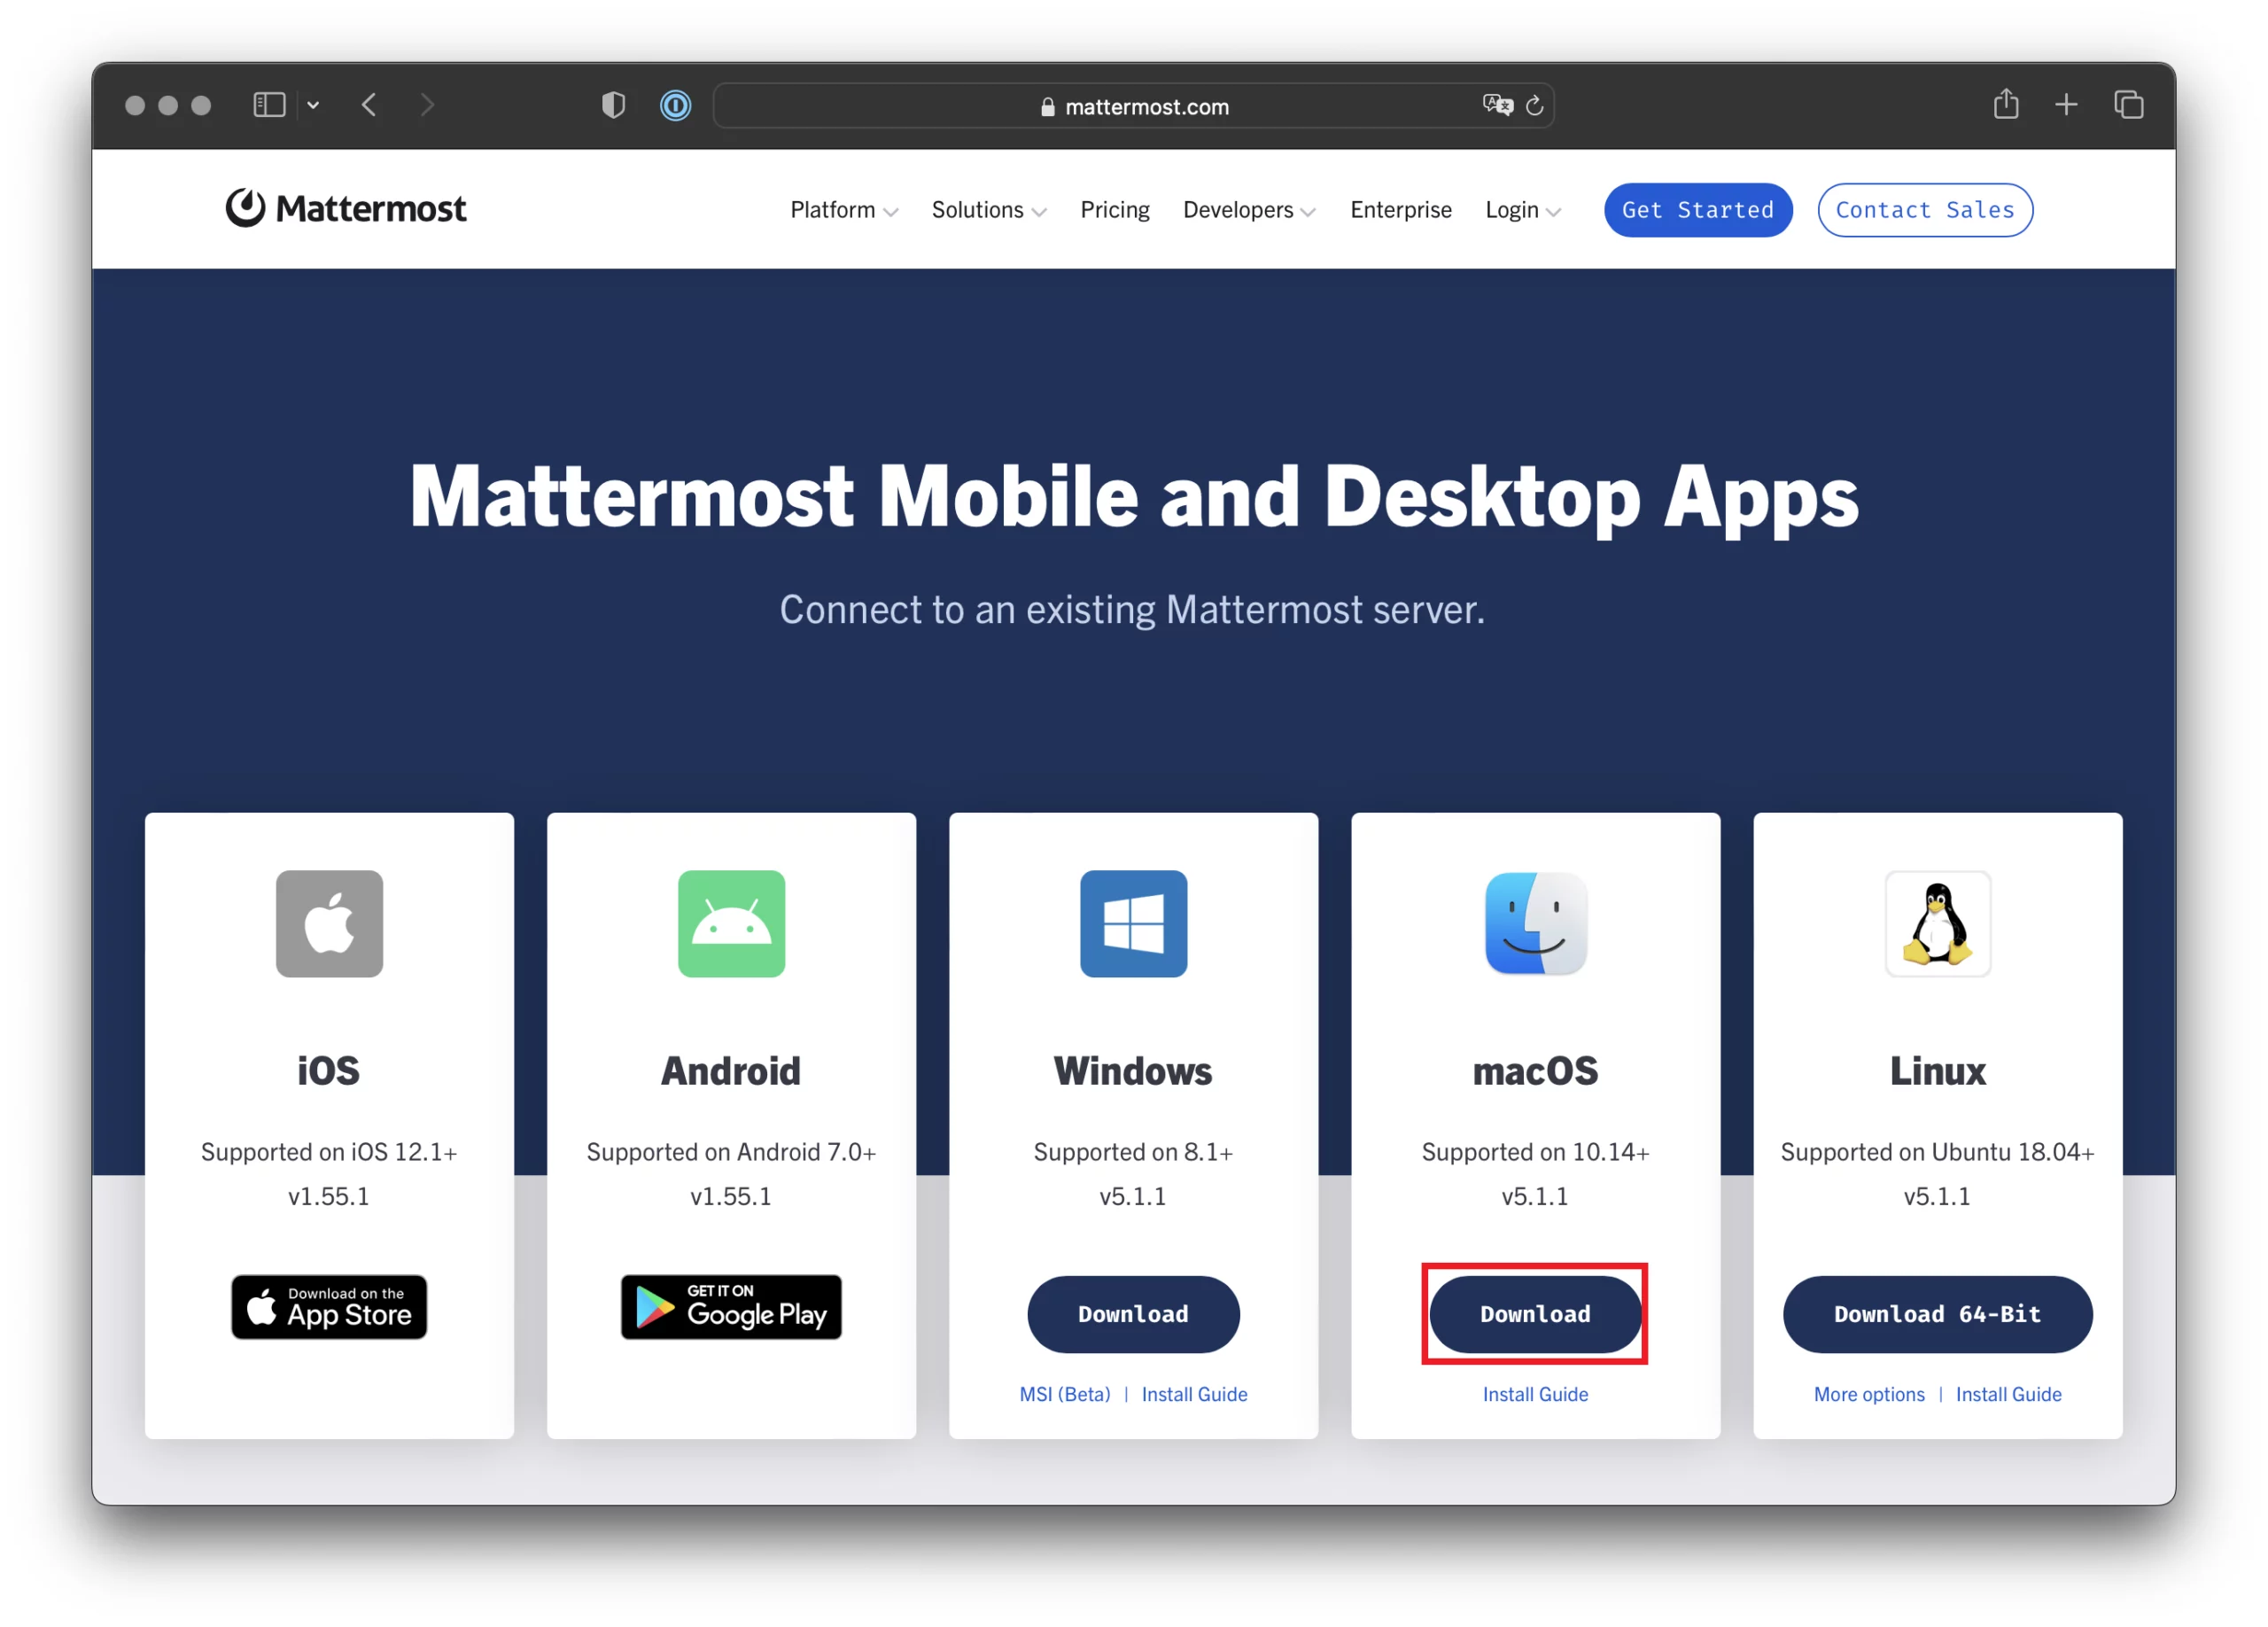
[Mattermost Mobile and Desktop Apps]より、[macOS]の[Download]ボタンを押下します。
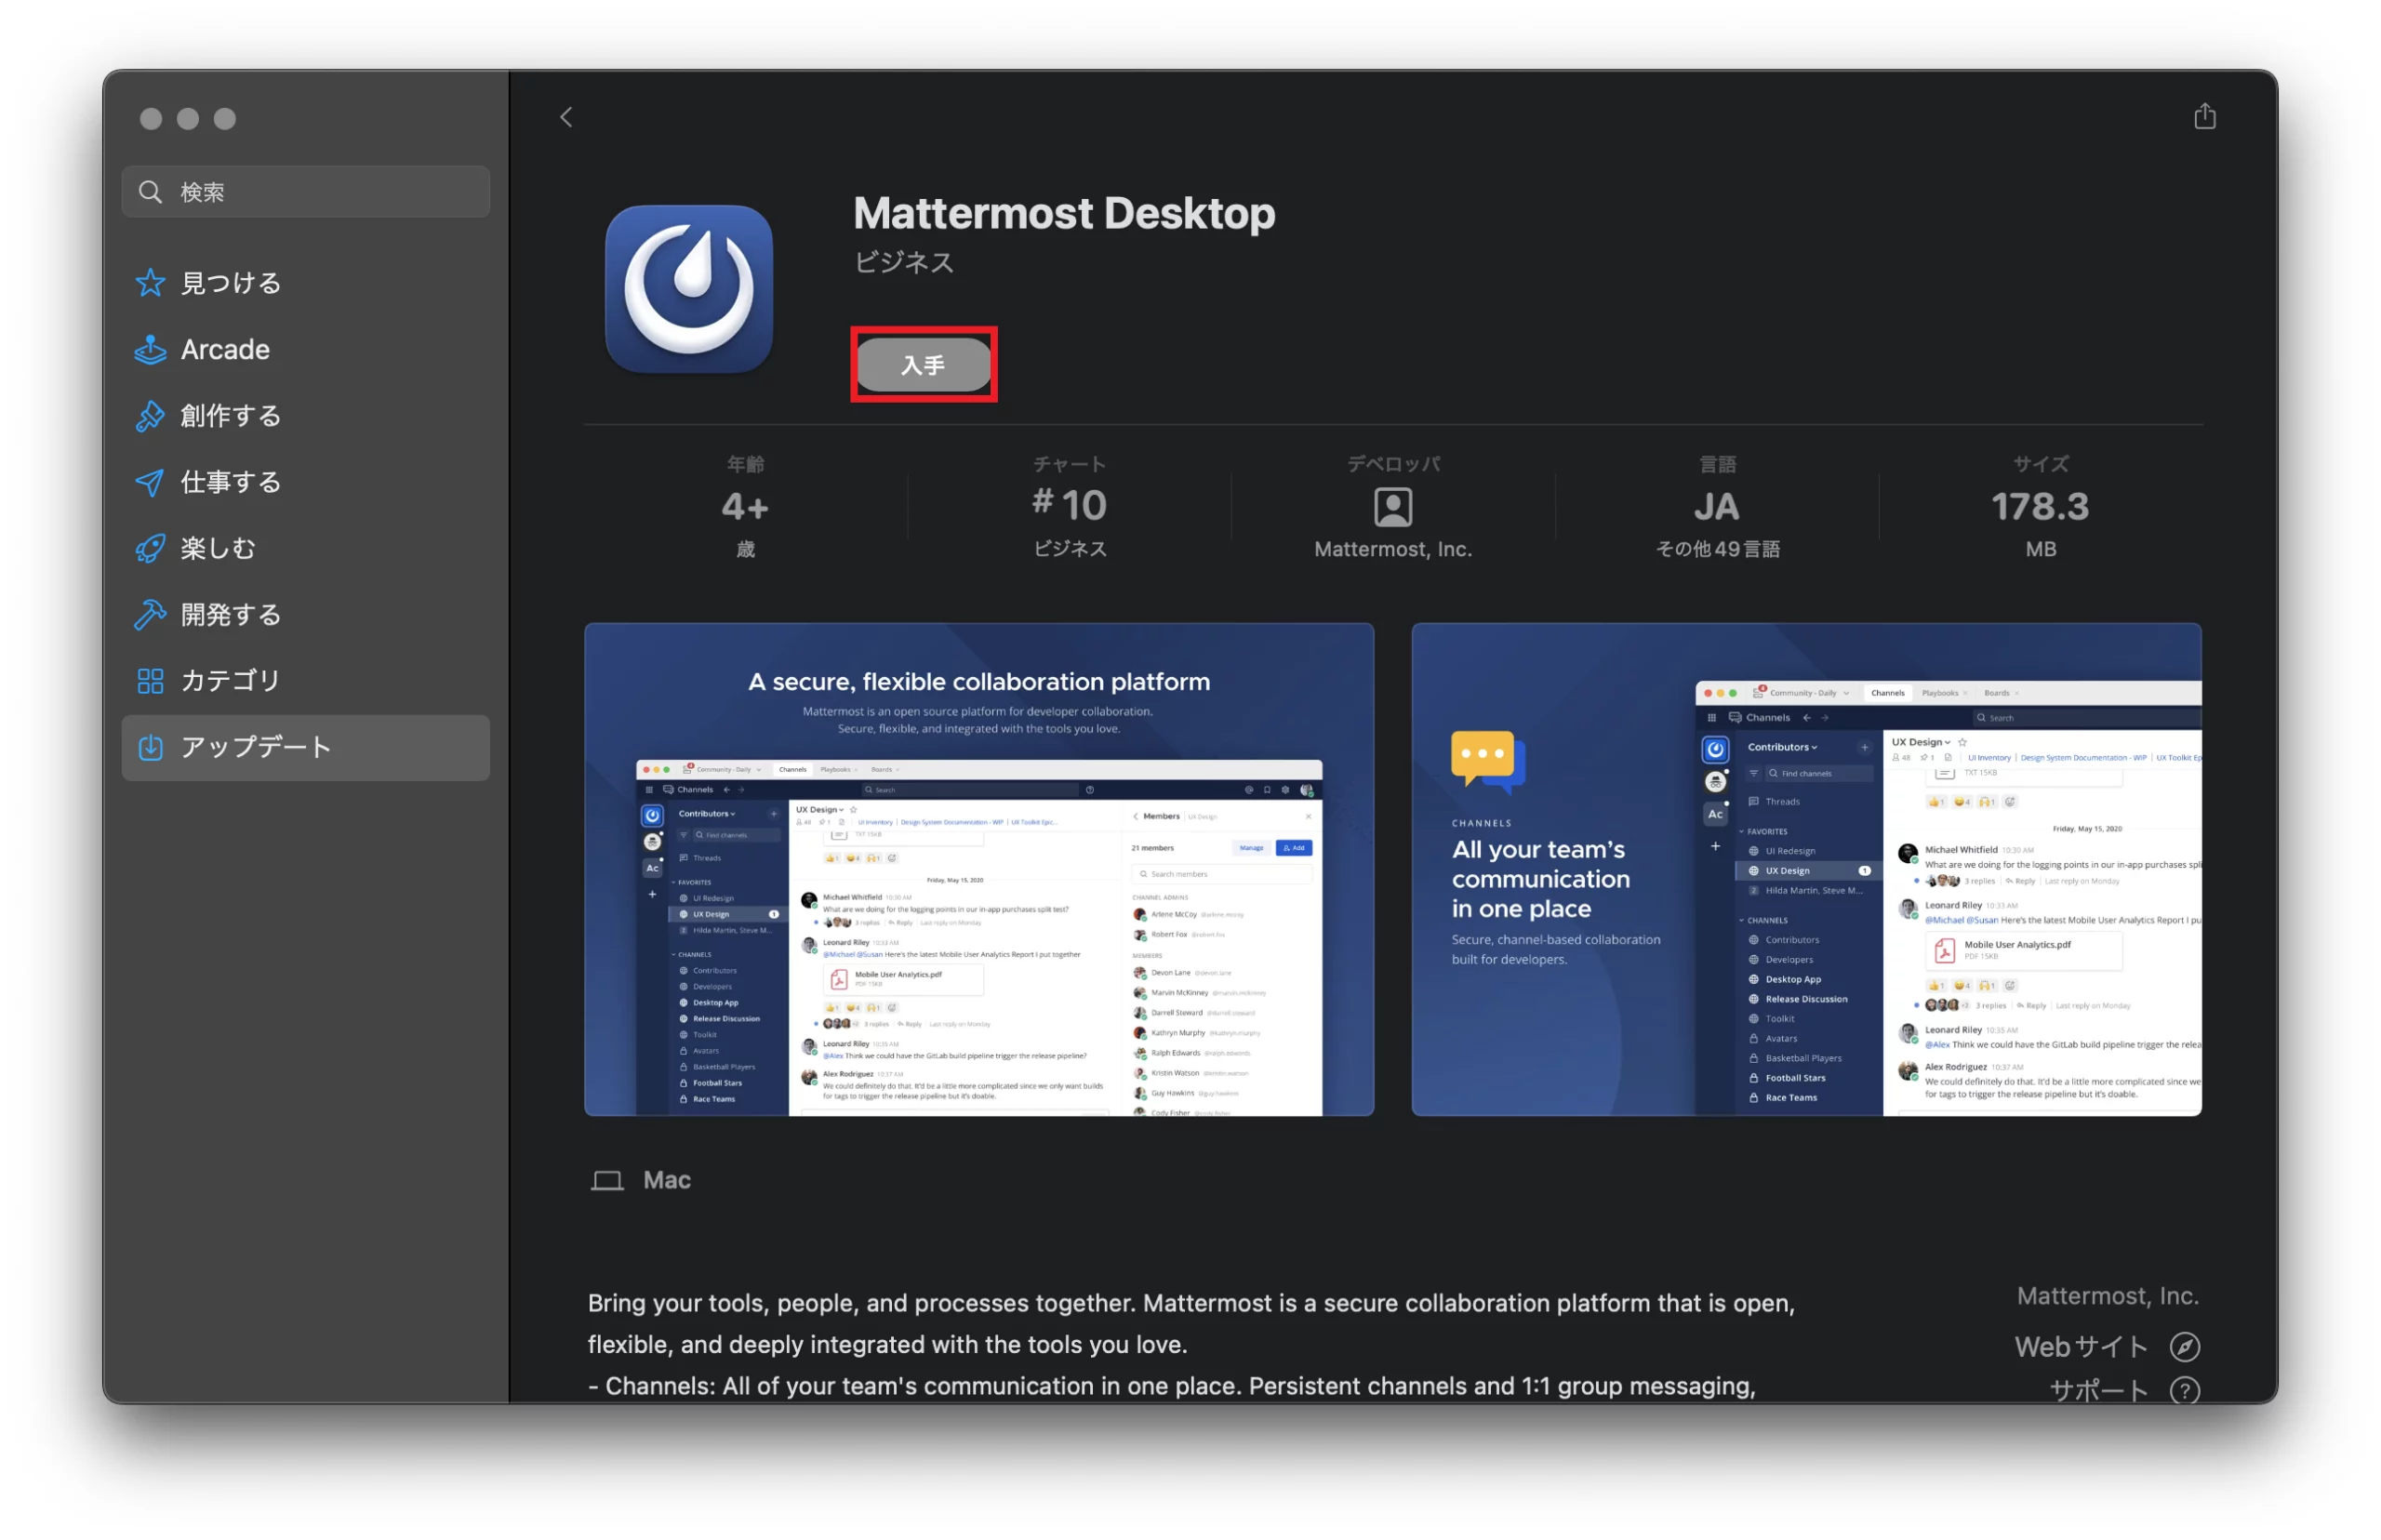
AppStoreが起動するので、Mattermost DesktopをApp Storeからインストールします。
アプリのインストールが完了し、Mattermost Desktopを起動すると、Add Serverと画面が出るため、Windows版と同様に稼働確認します。
以上でmacOSへのMattermost Clientインストールは完了です。
まとめ
今回は、Windows版、Linux版(Ubuntu)、macOSにMattermostクライアントをインストールしてみました。
Windows版についていうのであれば、MSI形式が配布されている点については、非常に良いと思いました。(GPOで一括インストールができる点)
また、Linux版についてはコマンドも多くなくインストールができるため、クライアントの導入難易度は低いと思います。
さらに言うと、macOSについてはAppStoreからのインストールのため、インストールという手順がほぼ不要でした。
これについては、OSSで開発されているが故の自由度ってところですかね。
おまけ
本ブログではVMwareやWindows、Linuxのインストール手順等も公開しております。
インフラエンジニアとして有益な記事や無益なコンテンツも作成しておりますので、通勤時間や休憩時間、休日のスキマ時間等に合わせて読んでいただけると幸いです。
また、Youtubeで解説動画も鋭意作成中です。本ブログで記事にしているものも動画にしようと思っておりますので、よろしくお願いいたします。
willserverのnoteも開設したのでフォローお願いします。

コメント